Best Fish Finders for Kayaks
Kayak fish finders require more thought when purchasing just the right one because they need to have features that you wouldn’t consider when mounting one on a boat. Kayak fish finders need to be compact, have a bright display, be easy to mount, and be inexpensive. You don’t want to spend thousands on a huge high end fish finder with all the bells and whistles only to have it sink to the bottom or fry the electronics when you flip your kayak.
These four fish finders are the best of the best for kayaks and they are designed by proven companies in the fishing and navigation industry. They work very well and will help you catch more, or at least see more!
Be sure to read about the best battery to pair with your new fish finder!
The List
Garmin Striker 4

The Garmin Striker 4 is the best suited kayak fish finder on the market in my opinion. It is compact, boasts an ultra bright screen with high resolution, and it is inexpensive. The awesome part about the Garmin Striker 4 is that there are several different options to choose from that offer Down View imaging, GPS, and larger screens. I own the Garmin Striker 4 Plus version of with GPS and it is an excellent fish finder for a very good price.
The unit has high end features not typically found in a fish finder in the price range, including CHIRP sonar and GPS navigation. The rugged unit is easy to use and I’ve never felt it is missing any features. The downside to this unit is that there really isn’t enough room for split screen. It also uses its own base to mount and isn’t compatible with other systems like RAM, Scotty, or Railblaza.
Pros
- Excellent screen resolution
- Size well suited for kayaks
- Easy to use
- IPx7 Water Resistance Rating
- Bright backlight for sunny days on the water
- Current draw is very minimal, .23 amps
- Nicely designed unit
Cons
- Vertical screen makes split display difficult
- Unit is not easily compatible with third party mounts
- Doesn’t come with screen cover, have to buy separately
Humminbird Piranhamax 4

The Humminbird PiranhaMAX is a great choice for a kayak fish finder. It is a basic unit with no frills, but it does everything you ask of it and does it well. It has a 4.3 inch display with excellent clarity and brightness and uses a dual beam sonar that can go down to 600ft. (455 kHz/200 kHz). This unit is perfect for getting out on the water with electronics on your kayak.
Some may find that the lack of GPS and down view imaging is a deal breaker, but this give you all the underwater information you need on the screen to make educated choices in your fishing and it does it for a good price. I would absolutely chose this for a kayak over and over again.
Pros
- Great price for kayak electronics
- Size is just right
- Ease of use
- Bright backlight
- Power use is low .18 amps
- Proven brand in sonar
Cons
- Vertical screen makes split display difficult
- Limited features
- No GPS
Lowrance HOOK Reveal 5

If you’re looking for reputable fish finders then look no further than Lowrance. They have a unique feature called FishReveal that combines the CHIRP sonar with Down Imaging scanner to provide picture perfect view of structure and baitfish. GPS is standard on the fish finder and it uses an auto tuning sonar to take the hassle out of the setup.
This unit is large and boasts a 800 x 480 screen just like the Humminbird Helix 5. However, it sure has a lot to offer and you can get the unit with a ton of different features including GPS, Down Imaging Sonar, and FishReveal. It also comes preloaded with US inland maps. The one drawback to this unit is that it is power hungry and runs at .9 amps. With a 10amp hour battery this will give you about 11 hours of runtime per charge.
Pros
- CHRIP Sonar
- GPS support
- Down Imaging
- Autotuning sonar
- FishReveal technology
- Memory card slot
- Bright backlight
- High def screen 800×480
- Preloaded maps
Cons
- Large unit if mounted on a small kayak
- High power draw .9 amps
- More expensive than other sonar units
Humminbird HELIX 5

Humminbird in on this list twice and for good reason. Their second offering suited for kayaks is the HELIX 5 fish finder. This is a high quality fish finder that is simply loaded with features. You can get GPS, Nav, CHRIP, and DI on the unit. Humminbird is a dedicated sonar company and they have made many quality units over the years.
The HELIX 5 has a beautiful high def 5 inch screen and it is perfect for split screen. The unit has dedicated mark buttons and it is easy to navigate. This is a hands down winner for kayak fishing as long as you’re open to having a larger unit on board.
Pros
- CHRIP Sonar
- GPS support
- Down Imaging
- Memory card slot
- Bright backlight
- High def screen 800×480
- Includes Navionics maps SD card
Cons
- Large unit if mounted on a small kayak
- High power draw .615 amps
- More expensive than other sonar units
Common Fish Finder Questions
Yes, they absolutely do, but you need to buy a quality unit. Otherwise there will be too much noise and interference to be able to tell fish and material apart in the water. A fish finder isn’t going to tell you what fish you see and what it wants to eat, but it will give you so much more information that you would not know without it. This includes water depth, water temperature, underwater structure, schooling fish, drop offs, thermocline, and much more. The more you know about the water you’re fishing, the more likely you are to catch fish.
DV stands for Down View imaging which uses a thin high-frequency beam to create picture-like images of structure, vegetation and fish. Down Imaging return views are the same orientation as traditional sonar, but they have real detail and take the guess work out of interpreting the fish finder results. Trees are very easy to identify, as are rocks and other structure such as sunken boats.
Side Imaging is a type of sonar that uses a razer thin beam to create an areal snapshot of the areas to the left and right of your vessel, roughly 400ft or so on each side. It provides an incredibly detailed view of the lake bottom from an overhead perspective.
This is different than Down Imaging because of the perspective. A pile of rocks on Down Imaging would show up as a single patch of rocks, while viewing it from Side Imaging could display the rocks as being in distinct groups.
Side imaging is very helpful in shallower water such as creeks, bays, and flats due to the orientation of the image. It lets you scan the water more quickly because you can see both left and right at the same time.
CHRIP is an acronym for Compressed High-Intensity Radiated Pulse. It is a technology that transmits a longer pulse than traditional sonar. Instead of pinging a single frequency, CHIRP devices transmit a sweeping range of frequencies that put out much more energy into the water and lasts much longer for a better view.
It improves bottom tracking at high speed and deeper depth. It also helps provide a crisp and clear separation of targets and objects and results in a clearer image.
In general, you will get the best detail resolution with the least background noise from higher frequencies, but they do not penetrate as deeply as lower frequencies.
Freshwater and inshore anglers generally choose higher frequencies such as 200kHz, 400kHz or 800kHz. This will handle water depths up to 200 feet.
If you are fishing deeper waters then you should focus on 80kHz or 50kHz. Dual-frequency fish finders using both 200 kHz and 50 kHz are the most popular with saltwater anglers.
If you look around there are a lot of options on the market that present dual band frequencies or CHIRP frequencies that cover much more of the spectrum.
GPS on a kayak fish finder is personal preference, however I tend to always go for it because it opens up the ability to drop a pin if you find a honey hole or some underwater structure you want to come back to. GPS lets you get back on that exact spot which can be hard to do on the water without reference points.
Fish finders from most brands are supposed to be water resistant, with most having a IPX7 rating which means they can withstand incidental exposure to water of up to 1 meter for up to 30 minutes.
However, from checking out a few fishing forums you can see that seals can still leak and water will quickly wreak havoc on electronics. That’s why we focused on economical choices with water resistance for the best kayak fish finders.
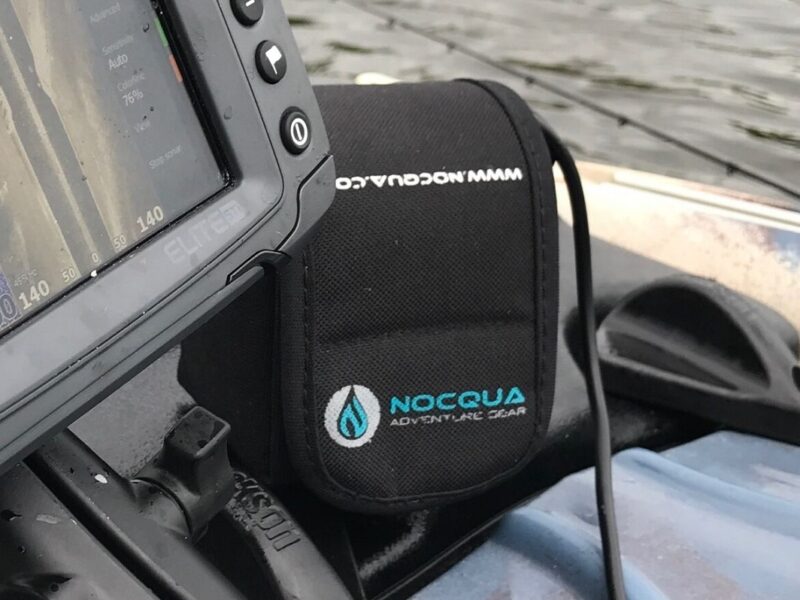
You will need a 12v battery to run your fish finder. A typical fish finder battery is rated for 12v and 10amp hours. Alternatively you can opt for a smaller and lighter but more expensive lithium ion battery. I personally use the Nocqua battery and is has been phenomenal.
You will need the following two specs to figure this out.
- Find the specs of your fish finder to see what the current draw is. This is listed in the manufacturer specs.
- You also need to know how many amp hours your 12v battery is rated for, it will say this on the side.
Once you have these numbers do the math below
Battery Amp Hours
—————————————– = hours of run time
Fishfinder Amp Draw
Ex: Garmin Striker 4 is listed as using a current draw of 0.23A @ 12V. In this case for a standard battery with 10ah you will get a runtime of 43.47 hours in a ideal scenario.
Remember, fish finders with smaller screens use less power, while larger models with GPS can drain a battery more quickly.
You have several options for a kayak mounted transducer.
- Through Hull: This involved mounting the transducer on the inside on your kayak and having the beam shoot through the plastic hull. It will be able to read through the hull as long as you securely fasten it and use water or another material or predesigned mount without air pockets to keep it in contact with the bottom of the kayak, however you do sacrifice water temp by using this method.
- Through Scupper: A lot of newer fishing kayaks have added special scupper holes that accommodate a fish finder transducer so it fits flush underneath the kayak and the wiring comes up through the scupper hole. This is a great way to mount the transducer and comes out looking very clean. Lowrance also makes a universal mount that can fit many different kayaks.
- Over the Side: There are many arm mounts available for this option and they work quite well. I’ve used the Scotty Arm Mount with great success. It stays in place and is easy to remove at the end of your fishing trip. No permanent attachment points or drill holes required.
You might also like
-
How to Choose a Fish Finder Battery https://www.bassgrab.com/wp-content/uploads/new_battery.png-e1606330609345-551x350.jpg 551 350 BassGrab https://www.bassgrab.com/wp-content/uploads/new_battery.png-e1606330609345-551x350.jpg
-
How To Choose A Kayak Trolling Motor Battery https://www.bassgrab.com/wp-content/uploads/sea-water-sunset-boat-morning-lake-58726-pxhere.com_-525x350.jpg 525 350 BassGrab https://www.bassgrab.com/wp-content/uploads/sea-water-sunset-boat-morning-lake-58726-pxhere.com_-525x350.jpg

-
Orca Walker Tote Cooler Review https://www.bassgrab.com/wp-content/uploads/orca-walker-tote-1200x540.jpg 1080 486 BassGrab https://www.bassgrab.com/wp-content/uploads/orca-walker-tote-1200x540.jpg